This next project was probably the one that most people comment on when they come into C’s room. Probably because it is so large 🙂 This was a project that I put together literally with stuff I had around the house.

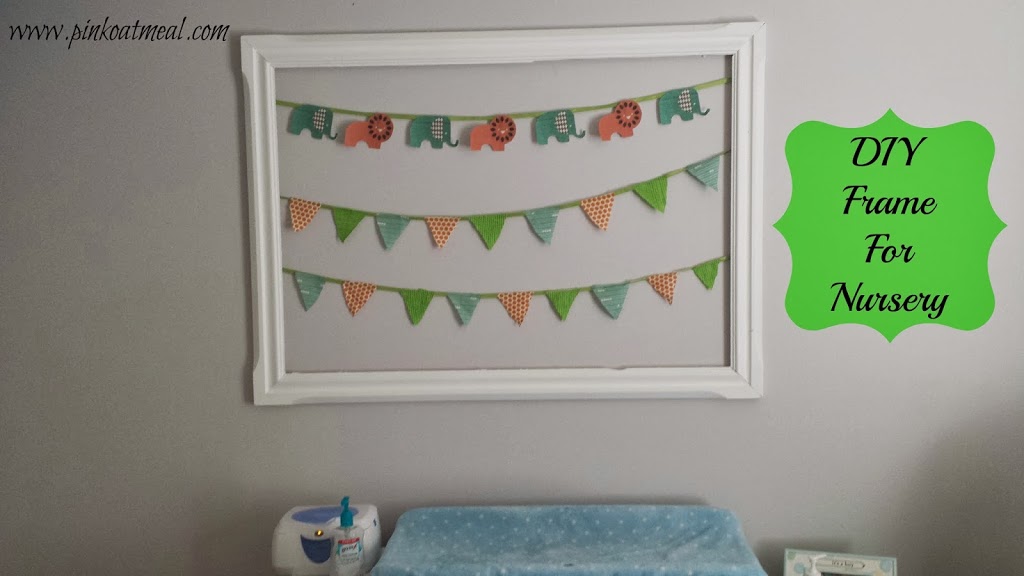
The Frame: This was a wooden frame on an old mirror that I picked up at a garage sale. I really had no idea what I was going to do with it when I bought it. Thank goodness we have a big unfinished basement that I am able to store some of my “not sure” stuff in. I Just popped the glass out and spray painted the frame white to match the furniture in the room. That easy!
Flags: I used scrap pieces of the material we used for the quilt and valence in C’s room and cut out triangles. I didn’t follow any sort of pattern. I was not aiming for perfection. I wanted a tethered safari type look. I used hot glue and glued them onto some ribbon that I had. To adhere them to the frame I justed used a staple gun.
Animals: These animals again matched the fabric in his room. I used my trick that I had in my prior post about the animal portraits of scanning the fabric on my computer. I blew the animals up to the size I wanted. I then hot glued them to the ribbon and stabled it on to the frame.
So simple and so cheap! I loved that I was able to upcycle things around the house. I love this frame in his room too. It fits perfectly right above his changing area!